Analytics

Blog Template

Pinterest

Showing posts with label tulle. Show all posts

June 12, 2013

Wednesday's Child - A Crochet Tutu-Torial


Wednesday’s Child:  No Sew Tutu-torial!

Every little girl wants to be a princess, right?  With the tutu craze still going strong, anyone can be a pretty princess. Lately I have seen them everywhere; at the mall, the grocery store, and at kindergarten. Even my 3 year old granddaughter will not go to bed with out a skirt or a tutu on. I kid you not. So, I thought for today’s blog I would post a crochet tutu tutorial.

Most tutorials and patterns call for tulle, a finer, softer mesh which unfurls gracefully like a blossoming flower when a little girl twirls. Tulle is easily bought and available in the colors of the rainbow!

You will need: 

Tulle
A small amount of yarn
Crochet hook
Scissors


I used scrap (about a yard and ½ to 2 yards) tulle, a bulky weight yarn and a size J hook to make a baby size tutu.  There is no real pattern to this, but it can be made in any size - just make sure you have enough material to finish your project.   


Measure the waist of the person you are making this tutu for.  I measured about 21” or 56 chain stitches.

1.  Chain 56


2.  Single crochet in second ch st from the hook.  Sc in each ch st to last ch st, chain 3, turn. (55)

3.  Double crochet in each single crochet stitch to the end, chain 1, turn. (55)


4.  Single crochet in each double crochet stitch to the end, finish off. (55)
Weave in loose ends.  The waist band is now finished.


 5.  Lay out the tulle lengthwise, fold in half.  Cut a 2” strip from the short side of the tulle. Cut the 2” strip in ½, giving you 2 strips. Cut as many as you want.


6.  Insert the crochet hook into a hole, fold a 2” strip of tulle over the hook, and pull about half way through. Pull the loose ends of the tulle through the loop you just pulled through halfway (this is the part you folded over the hook) until it is pulled tight. It will be self knotted. Repeat this step from end to end of the bottom of the band.


7. Cut a piece of tulle long enough to pull through the holes on the end of the band, tie together, trim tulle (if needed), and you’re finished!


This is a super beginner project! It would also be a good learning project for a child. My friend Bev and I sat down and did one each. I used red and purple tulle while Bev worked with red. It took us about 2 ½ hours from start to finish. If you don’t want to use a strip of tulle as a tie, you could sew on buttons or Velcro, or what my friend Bev suggested: leave a long tail of yarn at the beginning and end of the band, using the tails as a tie. We also found it easier to lay the tulle out flat, then folding it and cutting it. We started out by holding it out and cutting it while sitting on the couch. The strips were not even and they had jagged edges, but the end result was still great. 


My friend Bev’s first tutu!


As always, if you try any of my projects, please let me know how you liked it!  Questions, suggestions, and comments are always welcome! 


April 6, 2013

Ruffling Foot Attachment - A Review

**This article has been updated. Please see end of post for updates.**

In December 2012 I finally bought a little gadget for my sewing machine that I'd had my eye on for quite a while. It's called a ruffling foot and it's kind of scary looking, like it doesn't belong anywhere near a sewing machine. I got mine at Hancock Fabrics. It's made by Creative Sewing Solutions (but you can only get it through Hancock's).

Crazy, right?


But as I started using it, I realized how ridiculously amazing and time-saving this foot attachment could be. The first project I tested it on was a rather small one - a set of decorative holiday trees to sell at a local craft shop.

It did an amazing job and made super fast work out of making smaller pleats in long strips of beautiful (and thick) jacquard. I think they turned out rather pretty, if I do say so myself (and I do, of course!).

But then I stuck the contraption in a drawer where it patiently waited to be used again. Two months went by and I got it out once again to use on Liv's Sassy and Classy Tutu Dress.

Again, it just amazed me how easy it made the task of ruffling up some tulle for the tutu dress. And tulle is a completely different animal than the jacquard I used on the trees, so I was even more impressed.

You can see the ruffles made with the ruffling foot here.
And all was well and good until I noticed something rather disturbing. I'd gotten something in my hand while I was working on the tutu ruffles and it just kept getting more and more irritated. So I looked at my hand and there was a tiny splinter. I kept looking at it trying to figure out where I'd gotten a splinter and I was thinking that it didn't feel like a wood splinter (do different kinds of splinters feel different to you?), but it did feel like a metal splinter.

So I began to examine my machine and noticed tiny metal shavings on the platform between the throat plate and the housing. "Where the heck did those come from!?" I internally shouted. By now I was actually kind of panicking because I have no idea how to repair a sewing machine with a computer. Then I found it.

This.


And from another angle:


That's my needle clamp screw housing and I'm pretty sure it can't be replaced. How did this happen? Well, in order for the ruffling foot to ruffle, that 'C' shaped part goes on the needle clamp screw housing. As the needle moves up and down, it hits the 'C, which causes the ruffling foot to do its thing. Unfortunately, it really wore on my machine. This is after about ... maybe about 40 yards of tulle ruffling.

And not only did it damage the needle screw clamp housing, but because the table top machine is so lightweight and can't be secured to the surface it's on, the foot actually caused enough vibration to
break the needle loose once or twice. Luckily - as far as I know - it didn't cause any damage to the bobbin area. In addition, the ruffling foot vibrated so much during use that the settings actually changed themselves while I was working so the ruffles would be more like tiny pintuck pleats than ruffles.

Negative stuff aside, I REALLY LOVE LOVE LOVE the idea of using a ruffling foot, but this one just doesn't cut it with regard to my machine.

Please learn from this - ALWAYS READ THE REVIEWS BEFORE YOU BUY - if you can find them! It look like this foot has been discontinued by Hancock's. Maybe lots of people have had the same problems.

I would love to hear any feedback on how YOUR ruffling foot does for you!

Good luck with your ruffling adventures!

**Right after I wrote this post, I contacted Hancock Fabrics about the problem. I promptly got a response and they worked with me to find a solution to my problem. In the end, they decided I bought the wrong foot (pretty dang sure I didn't, btw) and told me they wouldn't repair my machine. But they did exchange my ruffler foot for one they said is the right one. It doesn't look different to me. And it didn't look different to the wonderful ladies at my local Hancock store, either. Once I get my machine repaired, I'll give the new foot a go and see if the same thing happens. Then we'll know for sure.**

March 31, 2013

The Sassy and Classy Tutu Dress Tutorial - PART 3: Skirt Construction and Finishing


Hi, everyone, and thanks for joining me for Part 3 of the Sassy and Classy Dress Tutorial: Skirt Construction and Finishing!

At this point, you should already have your bodice put together. If you don’t, check out Part 2 of this tutorial series. If you haven't started yet and need to catch up, go back to Part 1 for material prep.

Let’s get down to business!

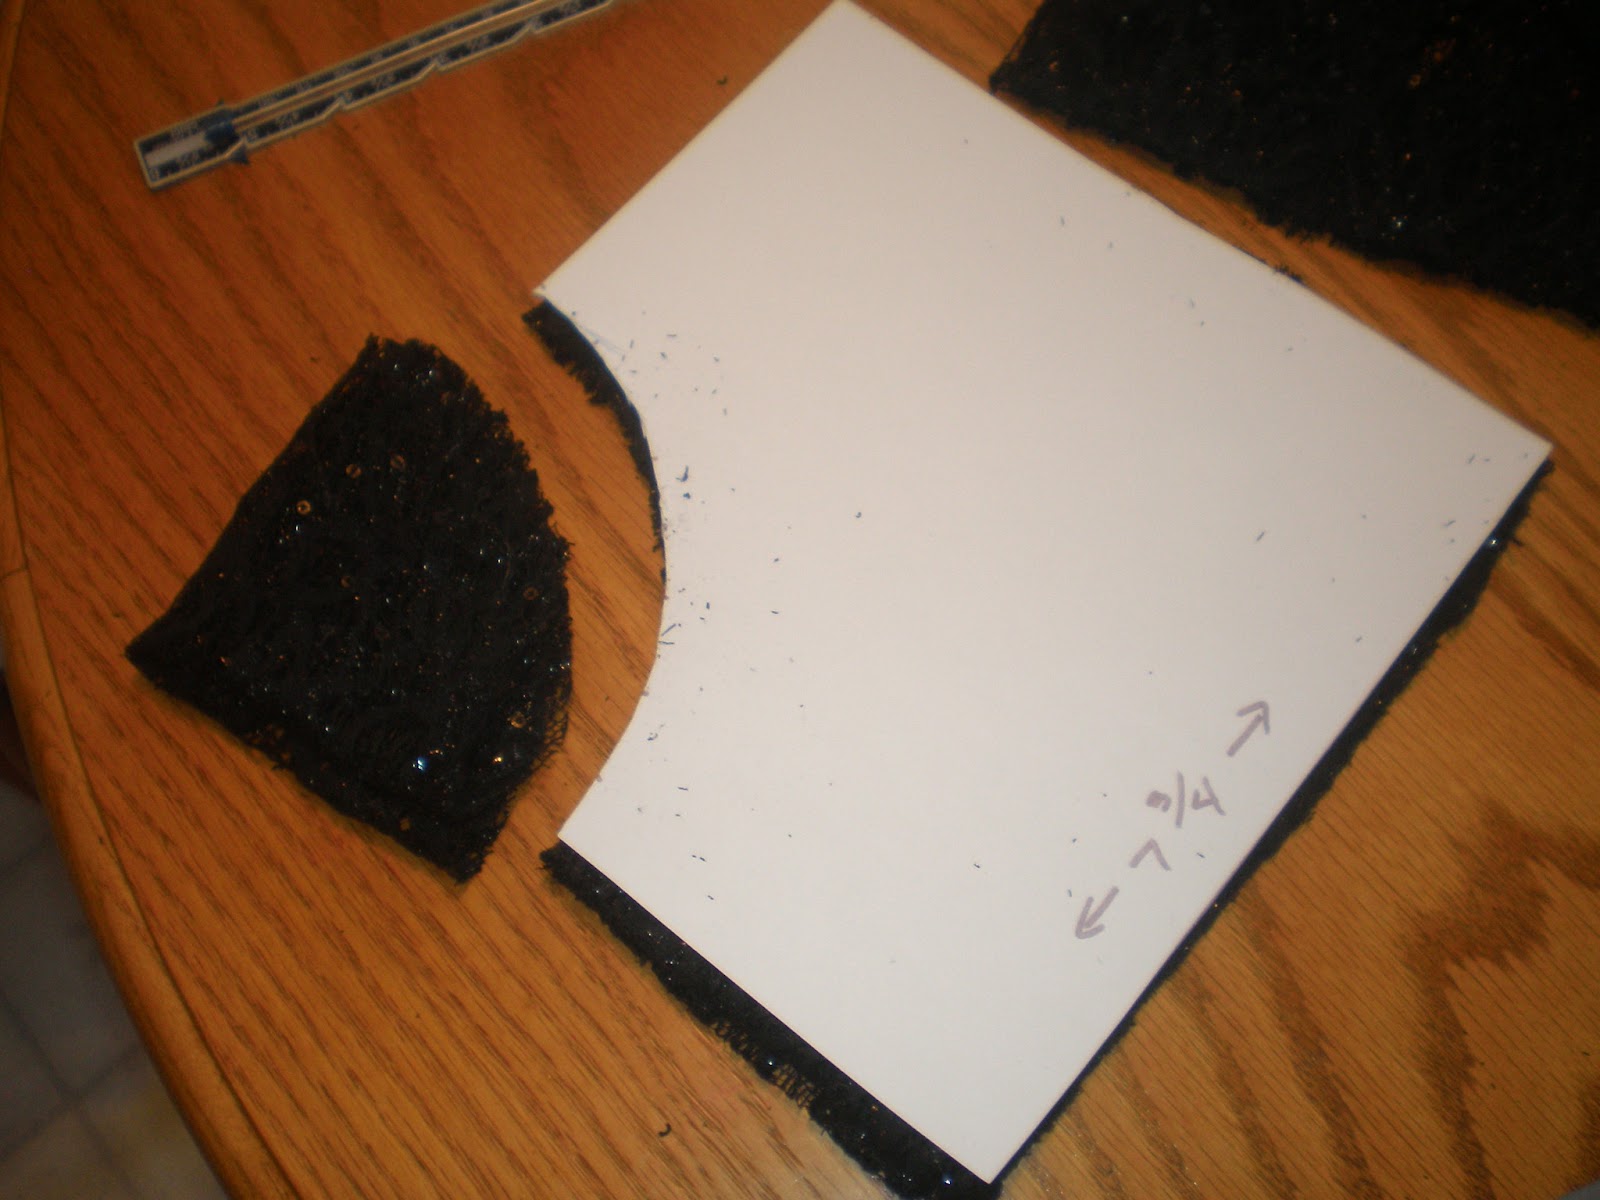
To make a super full tutu – one that fluffs out rather than one that just hanging down semi-flat – you’ll need a lot of tulle and a little patience. For this skirt, I used 5 yards of black tulle (4 will work just fine), and probably ½ yard of shimmery white (who knew there are different kinds!). I also used a square of stretch lace cut to about 15.5”x15.5” with a nice round circle cut out of the middle. I used it to lay over the skirt for 1) visual interest, and 2) to put a little weight on the fluffy tulle.

A 15.5"x15.5" square of stretch lace folded into fourths and the middle cut out. 
Hint: Fold into fourths and then cut out on the corner.


First, fold your tulle in half the long way. This will give you a 28” piece to cut rather than a 56” piece. Then fold the short way a few times until you get a 28” wide piece of tulle that’s manageable for you. Remember, there’s no need to be super- finicky since the unevenness gives the skirt more personality. From the fold opposite the selvages, measure 4” and pin the length (this will give you an 8” strip). Then measure over 8” and pin the length again. Do that two more times. Your tulle should look like this:

Selvage is on the left side, long fold is on the right side. Pins are at 8", 8", 8", and 4"

Cut your tulle into strips by cutting along your line of pins (but don’t remove the pins until you're ready to sew - this will keep them from being all over the place). You should have eight  8”x 180” wide strips of tulle all nicely folded and manageable with pins still attached.

Pinned 8" wide strip of tulle.


Let’s head over to the sewing machine and get it ready for ruffling!You can take your pins out now.

Put your bobbin thread in first (because once you put on the ruffler foot attachment you won’t be able to without taking it back off). Attach your ruffler foot and thread the needle. Set your ruffler to make the biggest tuck with the most number of stitches between tucks. Now adjust your machine to make long straight stitches (~5mm).  Ruffle away with a 5/8” seam allowance and be astounded at how easy this little (big!) foot attachment can make sewing life so easy!

If you don’t have a ruffler foot, you can gather the material by sewing a long straight stitch and then pulling on the top thread to scrunch up the tulle – takes a little more time but it gets the job done.  Sorry I don’t have a pic of this part. My 3 year old ran off with my camera to become my project photographer (not bad, eh?).


I ruffled each piece of tulle separately and then, using a long straight stitch and my regular sewing foot and a seam allowance of 5/8”, joined each piece of tulle with an overlap of about 1/2 yard. For example, when I got to the last ½ yard of my first piece, I added my second piece. When I got to the last ½ yard of my second piece, I added my third, and so on. As I stitched along, I added tufts of white tulle (9"x9" squares, scrunched up) into the skirt to give it some pizzazz. You can put it on top of the black tulle, under the tulle (harder, or in between tulle ruffles when you're overlapping. I should have used more - at least the whole yard. You’ll learn from my mistake, right? ;o)

White tulle.
White tulle all scruched up and ready to place in the seam
Ready to sew in the tuft of white tulle.
White tulle sewn in (look behind the foot).

 In the end, you’ll have a long, super-ruffle like this that your kids can play with as you watch with both awe and horror:


Here’s where it might get confusing (because I’m not sure how to explain it). Measure the front of your bodice. Multiply that number by two.  That’s the circumference of the skirt you’ll need. So take this measurement and a tape measure and measure that length from one end on your super-ruffle. Mark with a pin. Fold at the pin so that the end of your super-ruffle meets the pin and re-pin.

There are a couple ways to sew this skirt: 1) You can fold your super-ruffle around and around and pin so that you only have to fight with the ruffles once OR you can 2) just sew around and around and around on your sewing machine until your skirt is done. I chose the first way.
All pinned up!

Ready to sew.


So FUNtastically fluffy!

Now that the tulle is all sewn in a nice circle, I added my stretch lace on top, with wrong side of lace to right side of tulle. Sew with that same 5/8” seam allowance.
 
Stretch lace pinned on and ready to sew. The corners of the lace are pinned down so they'll stay out of the way as I sew. And, yes, the skirt really is standing up like that all by itself. Poofy!

Close up. Ignore the binding lace on the inside edge. Experiment gone horribly wrong.

 Pin skirt to bodice, right sides together. Sew skirt to bodice with a 5/8” seam allowance.

Skirt pinned to bodice. Again, ignore the lace binding. Horribly wrong.

I basted, and then sewed. Made it easier for me.

I would recommend serging the seam here just to make sure it’s not uncomfortable, but I didn’t do that on this specific project.

AAAAAAAAAAAAAND We’re done! WOOHOO! You now have a super cute Sassy and Classy Tutu Dress for your own little special someone!  **There are probably easier ways to do this than I’ve done, but I never said I take the easy way around, haha.


Don't forget to clip stray threads.

I hope you enjoyed my tutorial, even though this third part was a little long. If you make a tutu dress from this tute, I would absolutely LOVE to see pics! Please leave a comment if you have a question, if I left something out, or you just want to say something nice. I love reader comments!

February 23, 2013

Almost Two

Liv is turning 2 is less than a month, and I need a new outfit for her 2nd birthday pictures. I decided the theme for her dress - and ultimately for her pictures - would be "Sassy and Classy."

I have something fabulous in mind - a more formal tutu dress - so I went to the fabric store and grabbed some satin, lace, and tulle. I can't wait to see how the dress comes out. I've never worked with tulle before and only a few times with lace, so it may take a little time. I plan on documenting this "event" so if you're into tutorial's keep an eye on the blog - there will be one coming within the next week or so!

Happy sewing!
Related Posts Plugin for WordPress, Blogger...