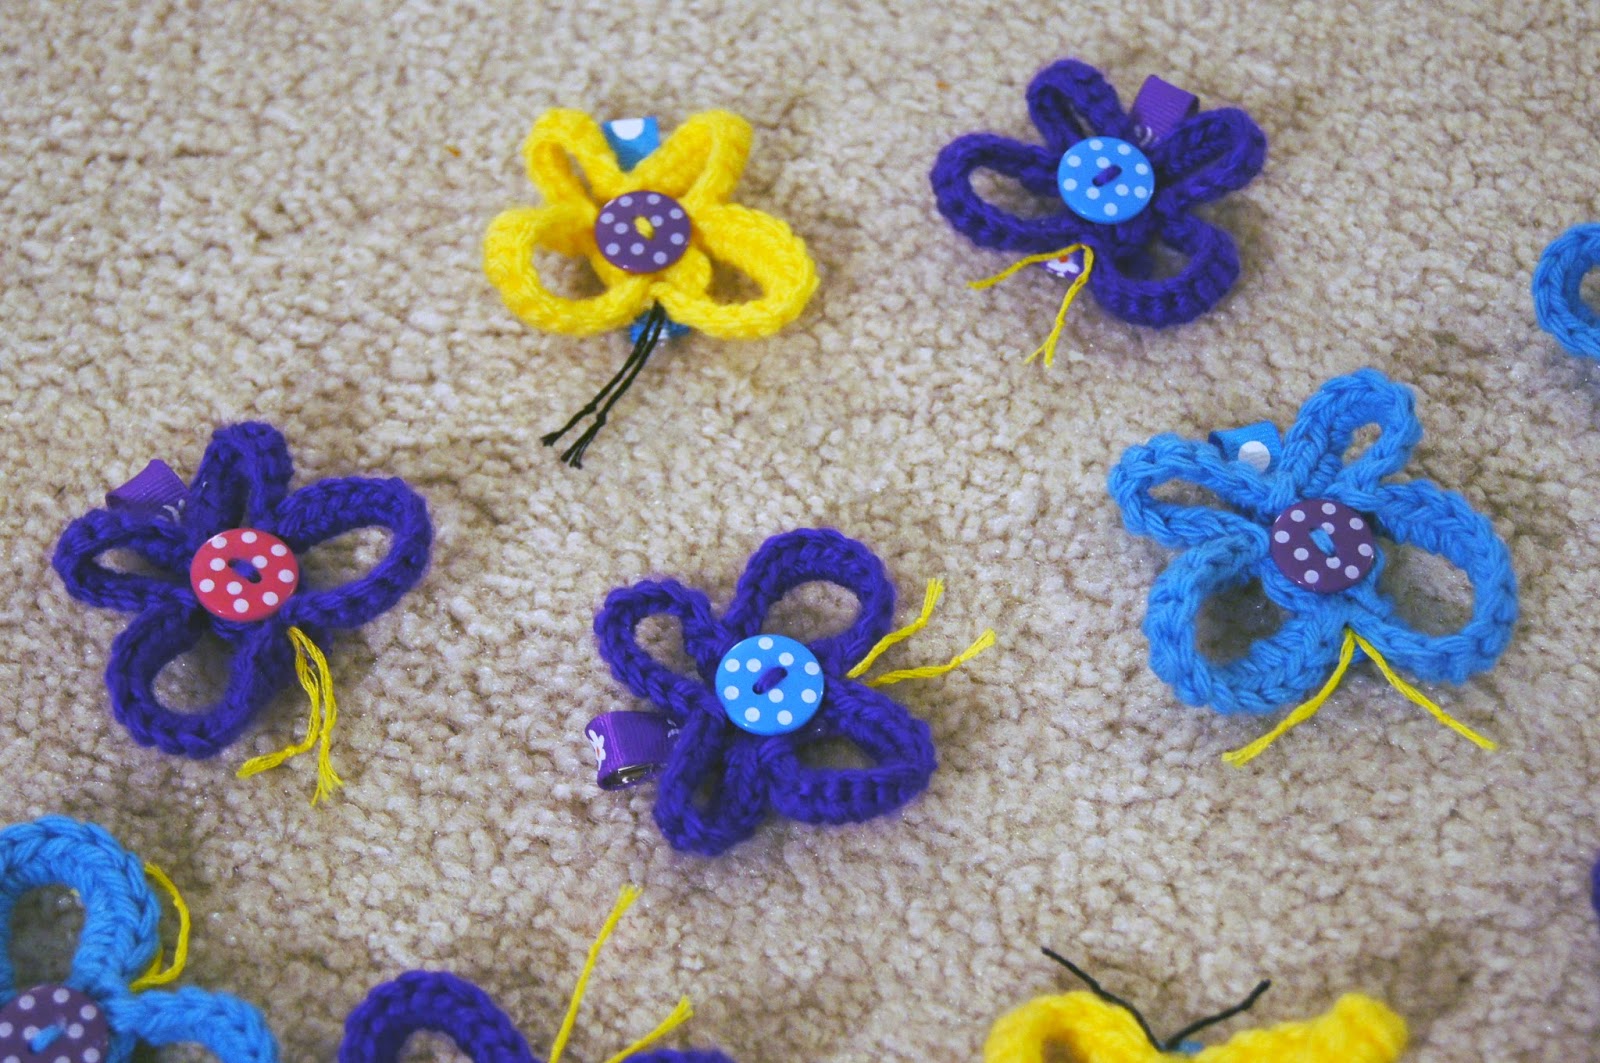
I haven't been around here for a while, so I thought I would give you something nice. A ribbon-covered butterfly hair clip in six steps.
I came across a crochet butterfly pattern a few months ago called from Everlaughter by Patricia Eggen. She mostly does appliques, but also has a few other patterns for sale. The butterflies really caught by eye, so I saved the pattern because I knew I would find a way to use it.
And so I did.
We're having Katie's and Ivy's birthday party this Saturday, and
since I made ribbon rainbows last year for the Rainbow Party, I thought I would continue the tradition this year. What four-year-old girl doesn't love hair clips, anyway?
Want to make some? Super-simple. Here we go! Six steps.
You'll need:
Butterfly appliques (I'm not going to share the pattern - it's copyrighted)
1.75" hair clips--one for each butterfly -- the straight ones are best
Ribbon to cover the hair clips; I used gross grain.
Hot glue and your trusty glue gun
Step 1: Pinch a clip open, and, starting on the inside, lay down a nice line of glue all the way to the end of the clip. Take your ribbon and with right side up, insert in the clip and press firmly.
Step 2: Now with the clip closed, lay down another strip of glue on the outside of the clip. Fold the ribbon over and press firmly to stick it down.
Step 3: Flip the clip over so the top of the other side is showing. Apply another strip of glue, fold the ribbon around the end of the clip and press firmly to he clip all the way to the end.
Step 4: Pinch the clip open and add one more strip of glue to the inside of the clip. Fold the ribbon over and stick down by pressing firmly.
There. You now have a ribbon-covered clip.
Step 5: On the top of the clip, you'll put down one last line of glue. Take your butterfly applique and press down firmly so that it's secured.
Let it cool and it's ready to wear!
I made one or two for each favor bag.
These little applique hair clips are a great way to use up left-over yarn. You could make these clips with any kind of applique type item: fabric flowers, animal appliques, ribbon, etc.
I hope you enjoyed learning how to make a ribbon-covered hair clip with a butterfly applique! Check out Everlaughter for some more really cool applique patterns.And if you make some cool clips, link me up in the comments! I would love to see!
Showing posts with label buttons. Show all posts
January 2, 2014
July 13, 2013
The Brooklyn Frock - A Pattern Review
The designer: The Peek-a-boo Pattern Shop
Cost: Free
Special skills: Bias binding, gathering, button placket, button loops
Cut + First sew time: 2.5 hours
My sample size: 3T
Over the last few days, I've gotten the chance to finally sew up a couple of these cute little dresses. If you're looking for a cute little dress that's quick and easy to sew up, this one is a pretty good fit. I really love the asymmetry of this design and how you can fab it up with really funky fabrics or chill it out with sweet little prints like the ones I used.
Yardages/Cutting: It only takes about ten minutes to configure the pattern pieces and get the pieces cut out, especially if you're cutting out smaller sizes. The pattern pieces are clearly marked/labeled with what they are, how many to cut, and whether or not to cut on the fold. Yardage requirements are pretty accurate, but it can't hurt to buy an extra 1/3 yard just in case you forget to do a layout before you cut (the designer recommends laying out first). If you lay out your pieces prior to cutting, you will have less fabric waste and may even have a nice usable scrap left over. Because of having to cut both main pieces of the dress on the fold of such a small piece of fabric, it would have been nice to just have a cutting layout included in the pattern. Not a deal breaker.
Special Techniques: Most of the instructions are very clear, though you do need some experience, or at least access to information or techniques, to accomplish some of the detail on this dress. One of the special skills you will need for this dress is how to attach double fold bias tape. Attaching bias tape is not something explained in the instructions so you might have to pull out that dusty sewing book or hit up YouTube for some instruction. I've only used bias tape one before so I had no idea what I was doing the first time around on this dress. Another special technique used on a major part of this dress is gathering. There are two or three different ways to accomplish this, so brush up on whichever way you like best and have at it. Buttons and button plackets are another detail used here, though I'm not sure the type used on this dress is an actual placket since it's done more like a keyhole here.
Sewing: This pattern goes together pretty quickly once you know how to do all the techniques mentioned above. First sew time (the time it took to get through the whole pattern the first time) was about 2.5 hours.
One of the drawbacks to this pattern is that notches aren't included in the sleeve pattern pieces. This makes gathering at the shoulder and at the bottom of the sleeve a little more difficult since they're supposed to be isolated to the centers. Pocket placement could be marked. The sleeve binding also gave me some issues due to how they're sewn together. The instructions tell you to attach the binding and then sew the sleeve and dress sides together at once. The finish would look nicer if the sleeve and dress sides were sewn and then the bias was attached - but this would require that you know how to finish a bias binding. Completing this step the correct way would probably make the dress sleeve more comfortable for the wearer and it would look nicer, too. Although I didn't change the pattern in any way, I would add a little something around the bottom edge - maybe more binding.

Labels:
asymmetric,
bias binding,
bias tape,
buttons,
clothes,
dress,
easy sewing,
free,
gathering,
pattern review,
placket,
review,
sewing
Subscribe to:
Posts (Atom)