

We're going to build a concrete stepping stone.
I ran across this project when one of the guys at work mentioned rhubarb leaf bird baths. He said you could use the leaves to "mold" the leaf into the concrete. Since I have a number of rhubarb mounds that spawn gigantic leaves (some are 18" wide and 24" long), I wanted to try this out. What a great way to have a unique yard or garden decoration. I guarantee any guest that sees it will be asking where you found one!
What you'll need:

- A rhubarb leaf or a leaf of any kind that has good veins. I've heard of people using elephant ears, canna lily leaves, large maple leaves, and more. Use your imagination!
- Chicken wire or hardware cloth (for stability and structure)
- Wire cutters
- Concrete or Masonry Cement - You could probably also use the vinyl concrete repair cement
- Plastic bag
- Bucket, wheel barrow, or other container in which to mix
- Water
- Trowel or garden spade, to aid in mixing
First, pick out a nice healthy leaf. A really veiny one that will really leave some good imprints in the concrete. Mine is really big, but you could make small ones, round ones, square ones, etc. (but you'd have to build or buy a mold for that). Cut (or fold) your chicken wire to fit inside your leaf. Folding seemed like the easy route, but I wish I'd cut it instead.

 |
| This is what I used for concrete. The options are literally overwhelming. |
Next, you'll want to find an area that's relatively flat and probably in the grass so that you don't get any concrete on your driveway or sidewalk. Lay out your plastic. I used a garbage bag.
Mix your concrete or cement until its a nice, thick, pliable, consistency. I've heard that it should be like brownie batter. That's probably a pretty good comparison. I mixed my concrete a half bag at a time inside an old cat litter bucket. It's hard work so plan on sweating a little. Make sure to use your little shovel to get down to the bottom of the container and get all the crumbles and mix.
****I want to stress here that concrete dust can be dangerous. If you don't have previous experience mixing concrete and have never handled it before, wear a dust mask and gloves. It also dries your skin out badly so gloves are recommended anyway. When you pour the mix into the bucket, try to minimize dust production in the first place.****
 |
| You can even probably find someone to do all the "heavy lifting" - and mixing - for you. |
 |
| Before mixing. |
 |
| Just started mixing. |
 |
| Almost there. |
 |
| Sill a little rough at this point and could have used some more water. |


Place your chicken wire on top and gently press down. Be careful not to poke or cut yourself with any cut wires.


Use the plastic to "round" the edges of your soon-to-be garden decoration. Do this by lifting the edges of the plastic and using your hands to pack and pat the concrete. This will help give it a nice smooth edge instead of a crumbly, jagged one.
|
| Crumbly edge. Let's firm that up! |


 |
| See this awesomeness? Ah, yeeeaah. |
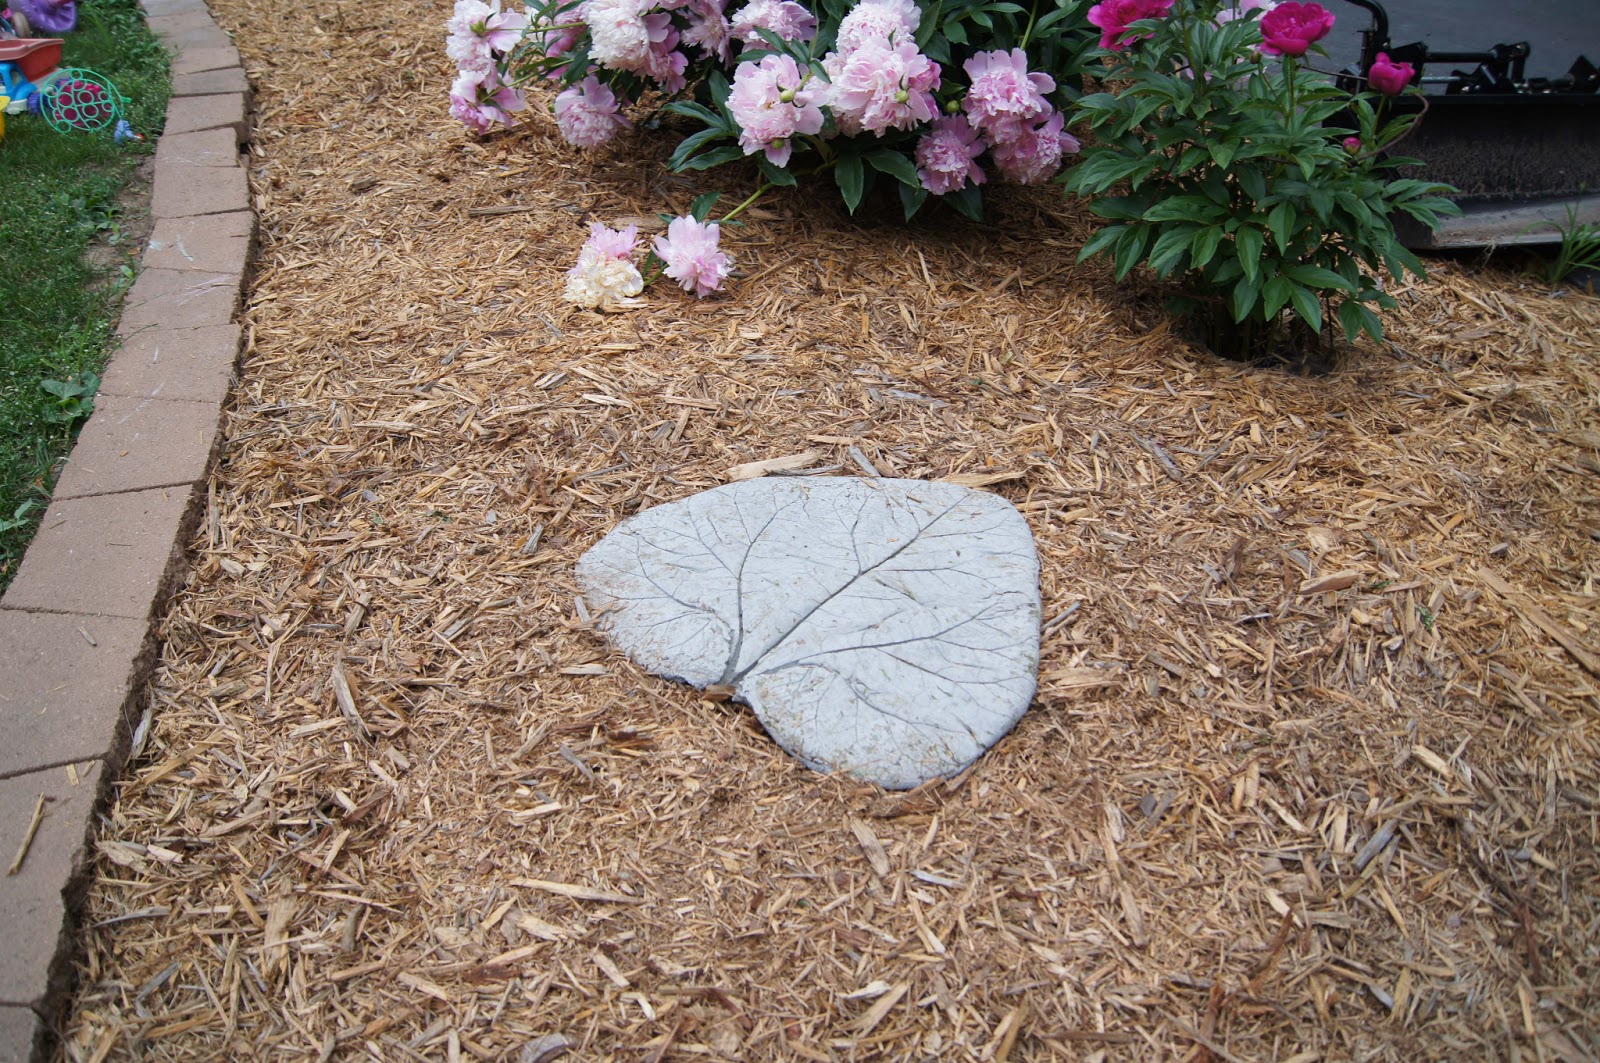
Now. The hard part. You have to wait for the concrete to do it's thing. Let it harden, or cure, depending on what kind of concrete or cement mix you're working with. The bag will give you the details. After about 24 hours, I was able to flip mine over and move it into the sun where it can cure and where the leaf will dry out faster. (more pix to come once it's in the garden!)
Once it's dry and you can't leave marks in it, remove the leaf. If you have a hard time getting the bits out, try a stiff bristled scrub brush, or just leave it - the weather will eventually take care of it for you.
 |
| After about 24 hours, I flipped the stepping stone over. If you magnify the image, you can see little burn marks on the rhubarb leaf - proof that you should wear gloves when handling wet cement. The burn marks are produced by a chemical reaction between the concrete dust and the water (Guy says it's an exothermic reaction producing heat - he's a smartass). |
 |
| Here she is! I haven't scrubbed all the bits off, just gotten off what I could with my hands. |
Want to check out some other resources before you commit yourself to my process? I don't blame you! Check out Suzie Homefaker's blog for more info on how to color your concrete or the Gardens West website. You can also just do a google image or google web search, but make sure you have your antivirus program running in case you run into some malware along the way (I did). Avast Antivirus is free and is a great antivirus program. I've been using it for years.
So head outside when the weather's nice and make yourself some stepping stones! If you have a question, please feel free to comment! I love to get comments and interact with you!


Very cool! Almost like making mud pies, but better!
ReplyDelete